Walkthrough
How to Use ChibiChu: Step-by-Step Character Guide
A step-by-step ChibiChu walkthrough: open a slot, build the base, adjust parts, import your own resources, save a pose, then export PNG, SVG or layered PSD.
Before you start
This walkthrough follows the public 1.0 build. ChibiChu is its own game, so you do not need Gacha Life open to use it — but back up your Gacha Life saves before the first launch anyway, because the build reads and writes save files.
If the editor is not open yet, start with the download and install guide. Everything below assumes you are looking at the character screen.
Step 1 — Open a character slot
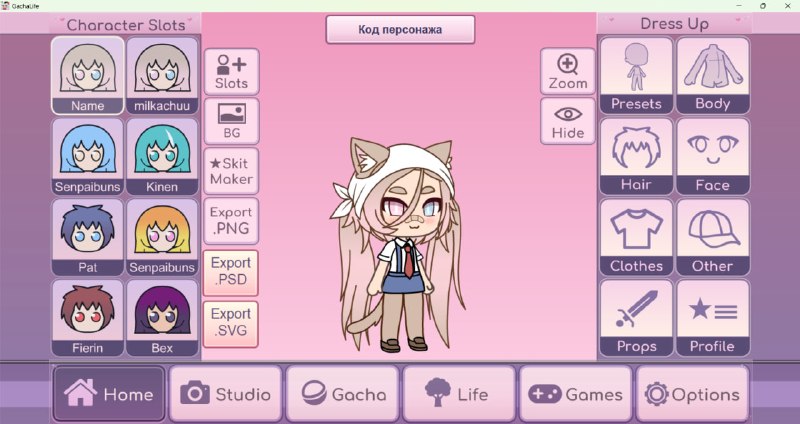
Slots run down the left side of the editor, and the mod adds six extra pages of them on top of the default set. Pick an empty slot for a new design, or open an old one to rework it. The extra pages exist so that experiments can stay where they are instead of being deleted.
Step 2 — Build the base
Hair, eyes, face and body come from the familiar Gacha Life library; nothing about that set has changed. Work shape first and colour second.
- Pick hair and eyes that still read at small size.
- Set skin and hair colour before clothing — that palette decides which clothing colours will work.
- On a first character, two or three matching colours read better than six that fight each other.
Step 3 — Adjust part by part
This is the part browser dress-up makers cannot do. Individual hair pieces, accessories and facial features can be moved and resized independently, and outlines can be recoloured across bodies, clothing, accessories and faces — so a hairstyle can take a coloured rim instead of the default dark line.
Move one part at a time and look at the result at 100% zoom. Stacked adjustments are the usual reason a character looks wrong with no obvious cause.
Step 4 — Import your own resources
The editor accepts your own images as clothing, hairstyles, accessories and facial details.
- Open the category the item belongs to.
- Find the import option, or your own resources area.
- Pick an image, apply it, then place and size it.
Start with a small, non-sensitive PNG under 1 MB and go bigger only after that works: the project does not publish an import size limit, so the safe move is to find yours from below. Do not import artwork you have no right to use, and do not upload personal photos.
Step 5 — Make and save a pose
Open the body section and choose the custom pose editor, then move, rotate and resize parts until the stance reads. Give the pose a name before you leave it — an unnamed pose is one you will build again from scratch.
Step 6 — Export the character
Build 1.0 lists three export formats:
| Format | Best for | What you get |
|---|---|---|
| PNG | Posting the character, thumbnails, profile pictures | A flat image at the size you export at |
| SVG | Layouts and print where the artwork has to scale | A scalable file — open it in a vector editor before relying on it |
| PSD | Keeping layers to edit later in a drawing app | A layered file you can restyle without redrawing |
Export, then open the file and look at it before you post anything. Crop edges and missing outlines show up at this step, not on screen.
Step 7 — Keep it, or send it
Unfinished designs stay in their slot. A finished one can also become a character code you send to a friend, so they can load it into their own build. Keep the code somewhere you will find it — it is a string, not a file.
What trips people up
- Skipping the backup. A modified build writing to save files is exactly when a backup earns its keep.
- Downloading a repack. Only the project's own channel is a source; every other host is a copy. See is ChibiChu safe.
- Importing something huge first. Start small, confirm the editor takes the file, then scale up.
- Expecting batch work. Bulk import and export are not documented; it is one character at a time.
If a button is not where this page says
Screens move between builds. Match on the label rather than the position, and check the project's channel for the version you have. This wiki documents the project's own pages and does not host files.